
I love photography. I find that the sheer act of composing an image forces me to ponder, appreciate, and really SEE what it is that I’m actually looking at, rather than just casually recognizing as familiar – and unconsciously dismissing – the greater part of the world.
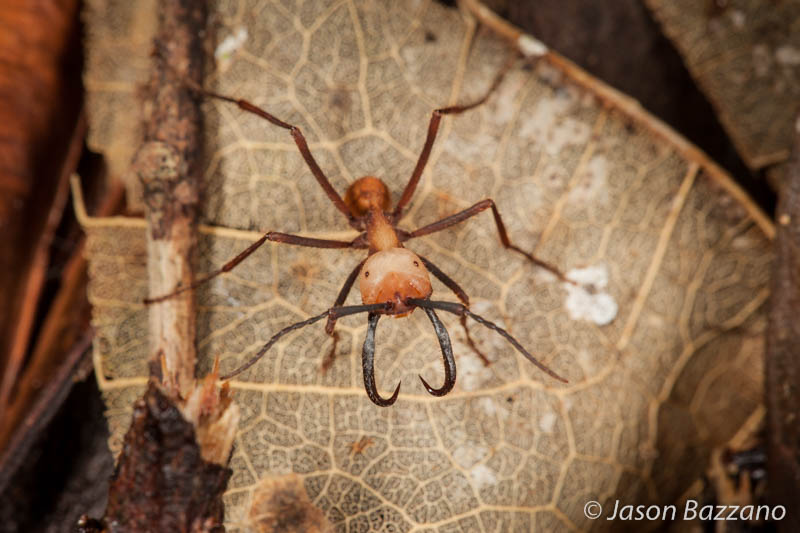
I’m particularly interested in photographing smaller critters, e.g., insects, amphibians, and non-avian reptiles. This is for a number of reasons, including:
- There are way more small critters than there are large critters, so I usually have photographic subjects close at hand.
- There’s a much greater diversity of small critters compared to large critters, so I never go long before encountering something really interesting or unusual.
- Larger quarry is often more difficult to approach than smaller quarry (well, at least sometimes…).
In my last article I wrote about how to attract some of our diminutive photographic subjects; now I’ll discuss how to photograph them. First of all, there are some substantial technical challenges of macro photography (photographing very small subjects) that need to be addressed. Arguably, the biggest issue – and the main topic of this article – is focus wrangling: getting the important parts of the image reasonably sharp, and the strategic use of out-of-focus areas when appropriate (or at least, when not inappropriate). Lighting, composition, etc., are all things that need to be considered as well, though I’ll get to those topics another time.
The Problem:
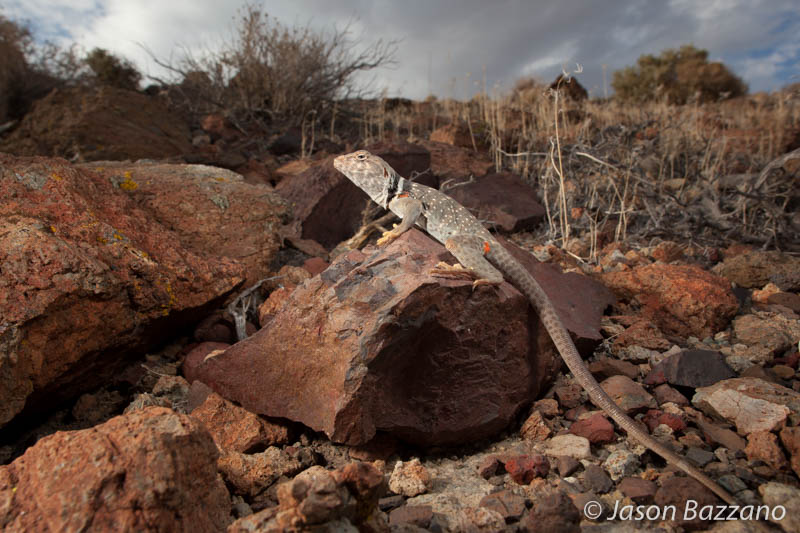
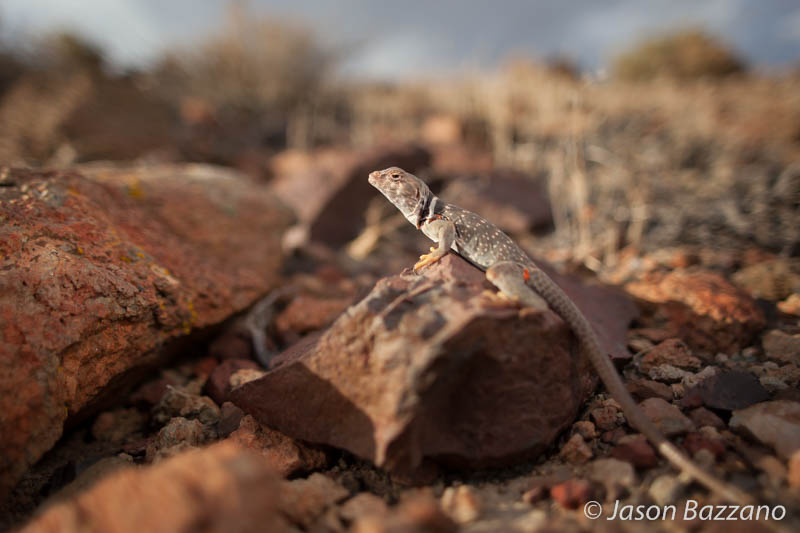
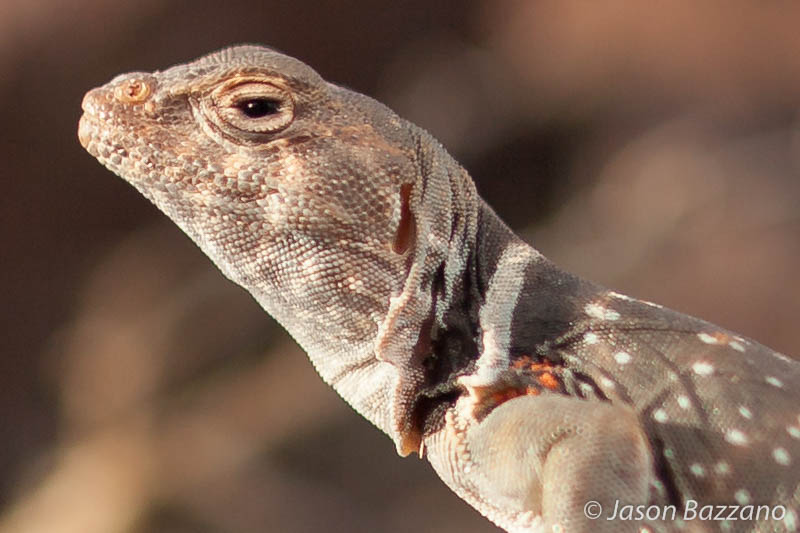
Depth of field is the distance on either side of the focal plane that’s tolerably in focus. Say you’re photographing a Great Basin collared lizard. You focus on its eyes, making everything in line with its eyes (the focal plane) also in focus. If its eyes are in focus AND the pile of rocks five feet behind it, then you have a pretty wide depth of field. However, if you focus on its eyes and you find that its legs and flank appear blurry, you’re working with a very narrow depth of field.
In macro photography, the depth of field is EXTREMELY narrow; indeed, the closer you get to your subject (either physically, or with the aid of magnification), the narrower the depth of field. This means that the margin of error when focusing on reasonably small structures is often measured in millimeters (as in, “which part of the eyes are you focusing on?”).
Depth of field can be increased by decreasing the size of the lens’ aperture (the hole through which light passes). To make this adjustment on your camera, you’ll increase the f-number – think, “bigger f-number, bigger depth of field”. So why not increase the f-number to the maximum value, then, to get as much of the subject in clear focus?
Well, unfortunately, there’s a hitch.
When light passes through an aperture, it tends to diverge (rather than simply traveling in a straight line). This confounding phenomenon is known as diffraction. When the aperture is very large (lower f-numbers, remember), diffraction isn’t particularly noticeable. But as the aperture gets smaller (and light divergence increases), the resulting image becomes more and more blurry.
Here’s a simple example. Say you’re photographing a very small dot. WITHOUT diffraction, after the light passed through the aperture of the lens, the photons would obediently zip along in a straight line, eventually landing in a tight cluster on the sensor inside your camera. This would result in the accurate representation of the original dot that you pointed your camera at. However, WITH diffraction, those photons would get all rowdy and veer away from the parallel plane after passing through the aperture, hitting the camera’s sensor like a diffuse cloud of buckshot. So now that small dot would be rendered as a somewhat larger, fuzzier dot.
Now think of a photograph as being composed of a multitude of little dots. With diffraction, these dots become larger and fuzzier – making the ENTIRE IMAGE soft. Not what we want.
So we’re now left with the macro photographer’s dilemma: depth of field vs. diffraction. We can have EITHER the (very narrow) focal plane of the image be in sharp focus (with the rest of the image being completely blurry) OR we can have the entire image somewhat in focus, but not have ANY part of the image particularly sharp.
What to do?
The Solution:
First of all, there is no one-size-fits-all answer. Sorry. Some might suggest setting your camera to a particular f/stop and leaving it there, but in reality, if you want the best photos possible, you’re going to need to adapt your strategy to the unique circumstances of EACH composition.
Your ultimate decision for the f-number will depend on a balancing act between the physical limits of image focus, and how much latitude your composition will allow you.
In other words, think before you shoot – you need a strategy.
Is the entire subject all in the same plane? Lucky duck. You have the relatively rare opportunity to shoot with as low an f-number as you like*. Typically, however, you’ll be photographing something that has at least some surface irregularities, which means you’ll have crank up the f-number.

Are you photographing a 3-dimensionsal object? Time to start dialing up the f-number. However, remember there is a limit here – if you crank up the f-number too high, your image will be all soft and mushy. You’ll need to turn up the f-number just far enough to allow enough depth of field to clearly render the subject matter – no more.
Photographing at REALLY high magnifications often means that the depth of field is so low that higher-than-optimal f-number must be considered… but there are always alternatives. For example, you could back away from your subject a little if extreme magnification is not critical to the composition – remember, the greater the distance between you and the subject, the greater the depth of field. Oftentimes just backing off by an inch or two is enough to give you that extra depth of field boost necessary to pull off a shot.
It’s worth noting that the hit in image quality due to diffraction means that there are some compositions that simply cannot be done successfully. I’m not saying you should just abandon the subject and put away your camera, though – this just means that you’ll have to be extra creative when selecting your final composition.
Wide Angle Macro Photography:
So far I haven’t mentioned the background of the image. While the foreground of an image is, of course, really important (duh), the background of an image can be the critical element that transforms a good image into a great one. Unfortunately, macro photos are not typically known for their engaging backgrounds. The reason for this is a little involved.
Many (most?) macro enthusiasts (myself included) use SLR cameras (SLR = Single Lens Reflex – those big fancy cameras with interchangeable lenses). The larger the sensor you have in your camera (and SLRs have large sensors), the narrower the depth of field… you can see where this is going. This means that SLR cameras are already biased towards a narrow depth of field, compared to cameras with smaller sensors.
Furthermore, SLR lenses designed to shoot macro typically have at least a mild to moderate amount of magnification; the idea being that you need the extra reach to put a little distance between your camera and your subject. A valid point, but the extra magnification of these lenses means that the depth of field gets EVEN NARROWER, reducing the background of most macro shots to a series of amorphous blobs of color (or all black, depending on your lighting).
Now, I like amorphous blobs of color more than your average dude, but unless you’re really careful, color blobs will often fall short in advancing the composition. If you want a macro shot with a background that is actually recognizable, you’ll need to use a close-focusing wide angle lens. And there just aren’t a lot of specially designed wide angle macro lenses for SLRs out there.
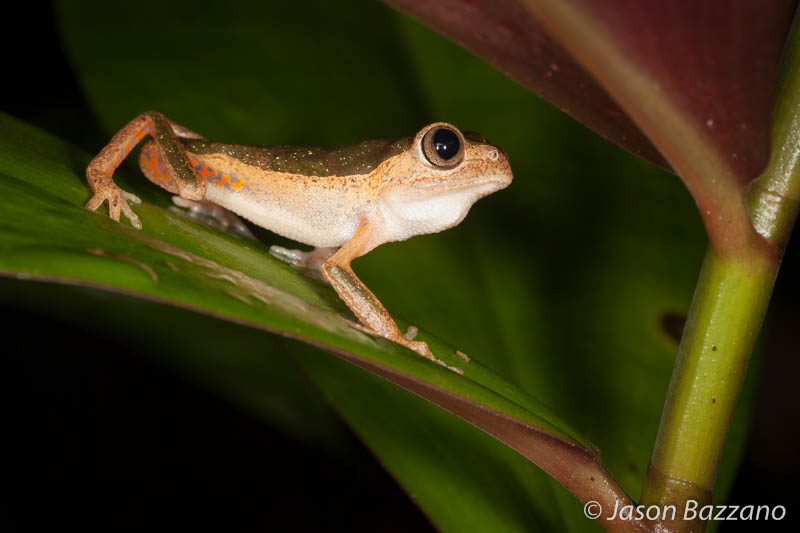
If you can track one of these unicorn lenses down, though, you’ll find that they’re a hoot. Typically they won’t give you as much magnification as a standard macro lens, so you won’t be able to photograph the REALLY small critters, but medium-small things like large insects, small lizards, and frogs are all game. Some standard (non-macro) wide angles can even handle critters on the larger side of small (e.g., a lizard that’s several inches long), though close-up performance in such lenses varies considerably.
The main hitch with wide angle macro lenses is that you need to be EXTREMELY close to your subject. Oftentimes almost touching the subject with the lens. Clearly, you’re not going to be sneaking up unnoticed on anything – you’re limited to critters that are tolerant of you being all up in their business (two words: “move slowly!”). If you can ninja your way up into the extreme personal space of the critter in question, however, you win the freedom of creativity with the background, and you can anchor your subject with some much-needed context.
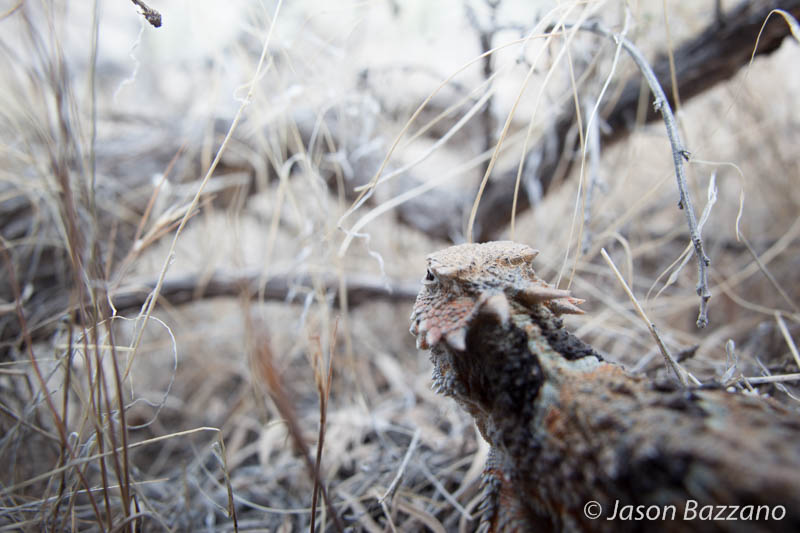
There is a potential problem, however: this close proximity to the subject may affect your subject’s behavior, which may make the photo look less “natural”. But on the other hand, the context given to the image by the presence of a recognizable background may make the photo look MORE natural…
At any rate, speaking from experience, you’ll likely fail a LOT more than you succeed… but the successes can really be special, making the extra effort just part of the game, and more than worthwhile.
An Alternative to all this Madness:
Focus stacking is a fancy way to have your cake and eat it too: you can have tack-sharp focus throughout the entire image with this technique. The idea is you take several different photos of a subject, each with a slightly different focal plane. You then import them into a software program that can extract the areas in focus of each of the images to combine them into a single image with everything in focus.
This can be a handy tool to have in your bag of tricks, though the simple act of acquiring the necessary images can be prohibitively fiddly. If you are hand-holding your camera or your subject is not inclined to stay completely motionless while you take its photo twenty times, this will likely not be a viable option. While this technique can produce splendid images, I find that – in the field – the stars rarely align to allow me to employ this strategy.
The Equipment:
While the basic concepts I’ve discussed are applicable to all cameras, so far I’ve only specifically mentioned SLRs. These are certainly not your only option. All you need to shoot small critters is a camera with a lens that allows you to focus on subjects that are relatively close. If you want to get the highest quality image that can be printed HUGE, then you’ll probably want to use an SLR. Most well-established SLR lens manufacturers (Canon, Nikon, etc.) have specially-designed macro lenses and various other macro-related accoutrements (e.g., macro flash units).
HOWEVER, if you don’t plan on making 20”x30” (or larger!) prints, you may be satisfied with a point and shoot camera. There are some point and shoots that actually have quite good image quality (especially some of the newer top-of-the-line ones), and you can make solid 8”x10” (sometimes larger) prints with these.
The ABSOLUTE BEST thing about point and shoots is also their biggest weakness: the small sensor size. The small sensor limits how much detail you can gather in a photo – thus limiting the size that you can print. BUT having a small sensor means that you can effortlessly shoot macro!
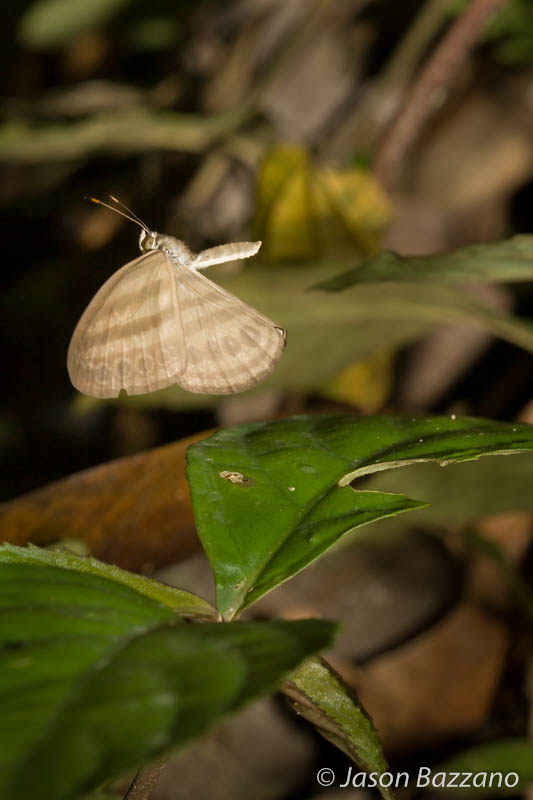
Here’s why. Say you have an SLR camera with a “full frame” (36mm x 24mm) sensor. Now you want to take a picture of a moth that is 36mm long and have it fill the image. In order for you to do that, you’ll need to pull out all your fancy macro gear, because in order to get 36mm of moth to take up 36mm of sensor real estate (1:1 magnification), you’ll need some serious close-up firepower.
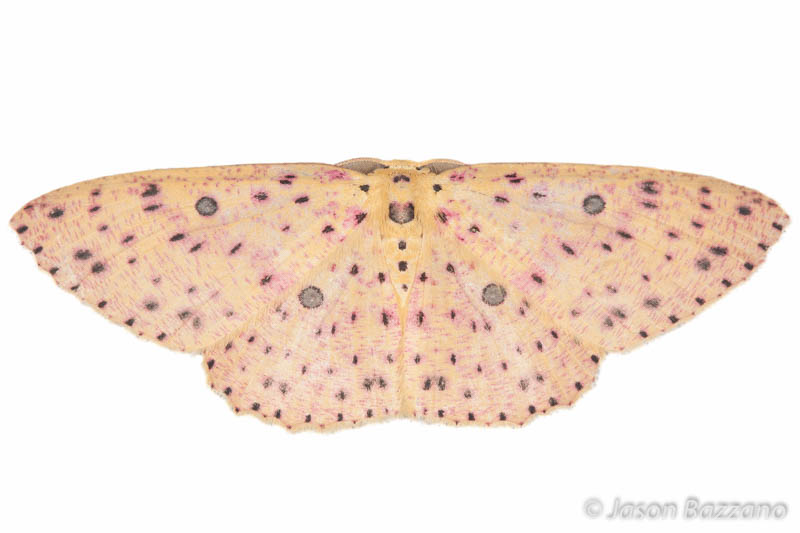
Next, you pull out your cheap little point and shoot. It has a sensor width of 6mm**. If you wanted to match the 1:1 magnification of your fancy macro-shooting SLR, you’d need to fill your 6mm sensor with 6mm of the 36mm-long moth – perhaps just its head! HOWEVER, if you wanted to fill the frame with the ENTIRE moth (36mm of moth onto 6mm of sensor), that kind of magnification (1:6) is unremarkable. BUT you’ve still filled the frame with the moth, and that’s pretty cool!
Furthermore, point and shoots typically reach their close-focusing maximum at the wide angle, which means you could include the background with your subject. Double bonus.
In Conclusion:
Hopefully all this talk of macro photography has inspired you to go out and take your own shots. Photography is a fantastic enabler for the exploration of the natural world. If you’re looking for some inspiration, check out some of my own shots (many of which are macro or macro-ish). Have fun!
* Well, maybe not the ABSOLUTE lowest – you should probably close down the aperture a little bit. Reason being: lens aberrations can also cause issues with image quality.
All lenses render unwanted artifacts in the image (distortion, vignetting, etc.). Fancier lenses have fewer imperfections (and command some serious plata), but they still aren’t perfect. While some of these aberration-induced artifacts are unavoidable no matter what you do, some of these artifacts are less visible at higher f-numbers.
Each lens will have its own “sweet spot” where increasing the f-number will reduce these artifacts and cause the image to become noticeably sharper, but before diffraction starts to rear its ugly head. This is information worth knowing – if you really want to get the best image possible, I recommend doing a little research on your lens’ optical performance at different apertures.
…Of course, macro photographers rarely shoot with an f-number low enough for this to matter anyway; we’re typically smooshed firmly against the diffraction ceiling, up there with the HIGH f-numbers…
**Sensor widths of point and shoots are actually quite variable, but ~6mm wide is typical.