
Now that summer is finally here, I’m excited to get back into one of my favorite summertime activities: black lighting for insects.
What’s that? You’ve never been black lighting? Get out. It’s only the best thing ever.
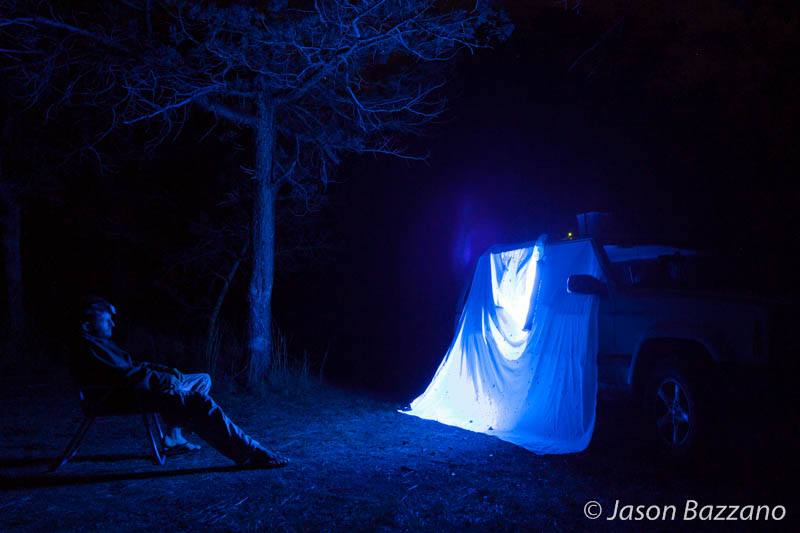
Here’s what you do. The next time you go camping, hang up a bed sheet right around dusk, such that the bottom has at least a few inches resting on the ground. Shine an ultraviolet lamp on the sheet, grab your favorite beverage, and watch the insects come in.
It’s about being a naturalist at the speed of beer.
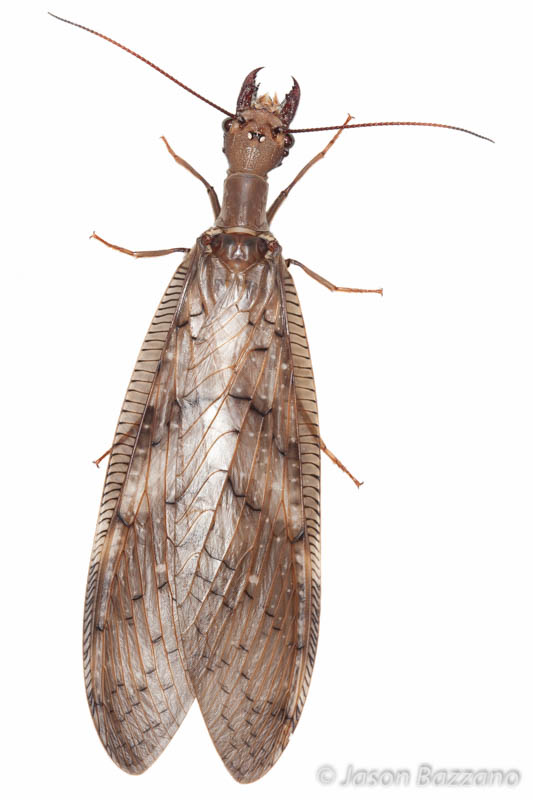
Typically, loads of neat insects appear, including species you don’t see that often out and about. The really cool thing, though, is that you never know what’s going to show up. You can increase your chances of finding, say, a giant dobsonfly (Megaloptera: Corydalidae) if you set up camp near a water source or a showy long-horned wood-boring beetle (Coleoptera: Cerambicidae) if you’re in an area with a lot of downed wood, but the precise species and number of individuals often varies widely – even from one night to the next at the same location.
Some of this variation is due to weather (warm, still, humid nights tend to be good) and phase of the moon (dark, moonless nights tend to be better), but really, a big part of it is luck. Sometimes you’ll find more insects than there are in a cheap Sri Lankan hotel room (something about a bed sheet covered in insects stirs up some serious memories), and other times far fewer. But there’s always SOMETHING interesting – I’ve never been disappointed black lighting.
The little critters aren’t going anywhere, either, so you can observe them at your leisure – whereas during the day, a lot of insects will be gone by the time you’ve reached for your field guide (let alone cracked open your beer).
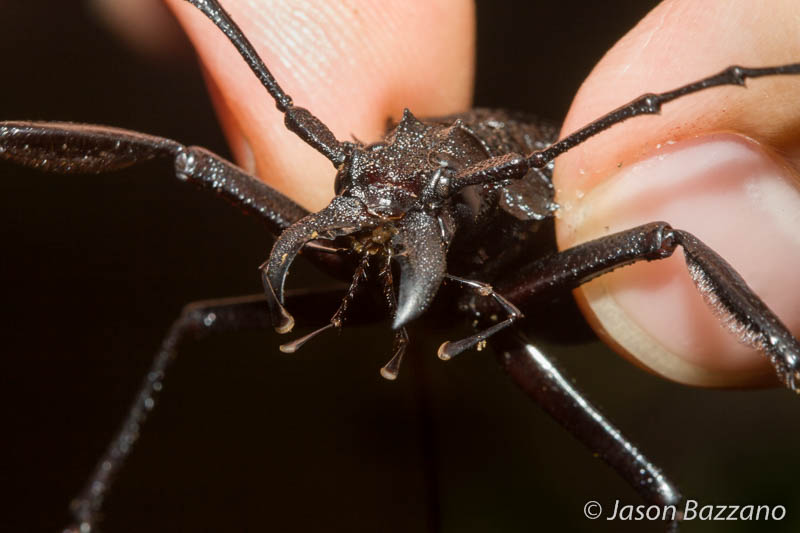
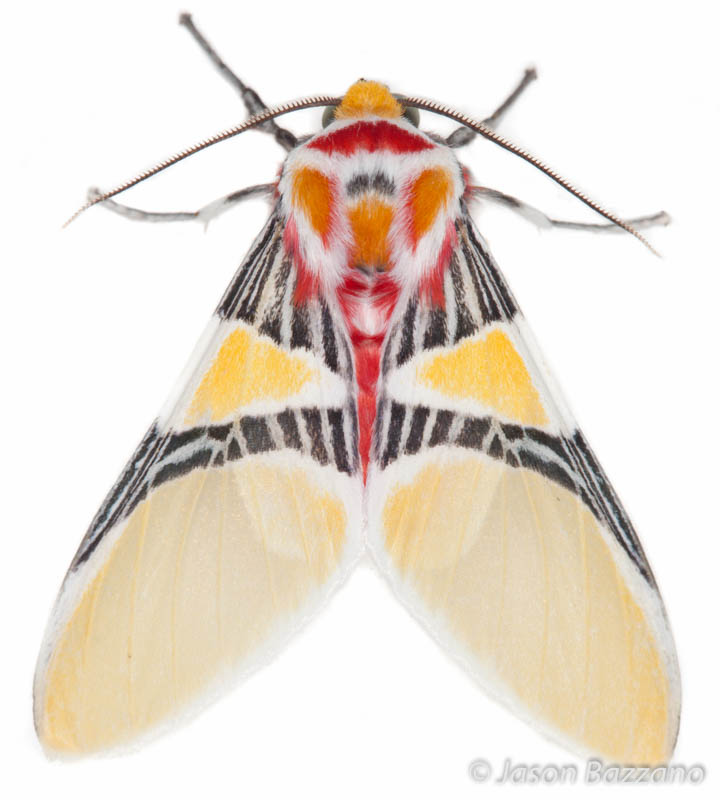
It can also be fun to photograph the insects that come in. Because the insects are relatively stationary, you can often get close enough for some macro shots. Of course, with a blank white sheet as your backdrop, the photos tend to lack a bit of contextual punch, but they have a minimalistic charm that I find appealing, and they can be a great way to scope out the smaller details of the little critters that you might have otherwise missed just eyeballing them.
A side benefit of running a black light at camp is that the lamp tends to draw insects away from you and your dinner. Of course, insects that rely more heavily on scent than vision (ants, mosquitoes, etc.) are largely unaffected by the party lamp’s siren call.
The science behind black lighting for insects:
We’re actually uncertain as to WHY insects dig nightlights so much, though the most common hypothesis suggests that the light interferes with their navigation system. It’s suspected that these insects are using the moon as a point of reference when moving about. For example, if you were going on an off-trail hike, you might decide to keep the sun on your left as a crude way of making sure you’re walking in roughly the same direction. You can imagine what would happen if you decided to use a streetlamp a few blocks up instead the sun. Keeping it on the left, you’d simply circle around and around. And indeed, insects aren’t flying straight at your light, either. If you look carefully, they usually are flying NEXT to it, spiraling inward in tighter and tighter circles.
Interestingly, insects are more strongly attracted to certain wavelengths of light. It’s unknown how much variation there is from species to species, but in general, the more ultraviolet light, the more an insect is interested. That’s why mercury vapor street lamps (which throw a lot of UV) tend to bring in a lot of insects compared to other lights that put out mostly longer wavelengths.
Build your own black lighting setup:
So here’s what you need to throw your own black light party: a power source, a black light, a bed sheet, and some way of rigging it all together. Let’s start with the easiest part first: the bed sheet. You can find an old one for cheap at a second-hand store (if it’s not already stained, it will be soon!). Sewing on some Velcro straps can be very useful in rigging this up. I usually attach this to the supports of a canopy, some nearby branches of a tree, or – if I’m feeling especially lazy – just to the side of our car.
Next, the lamp. Go with a fluorescent bulb, as they tend to use substantially less electricity than incandescent. Here’s a 20 watt unit that works well.
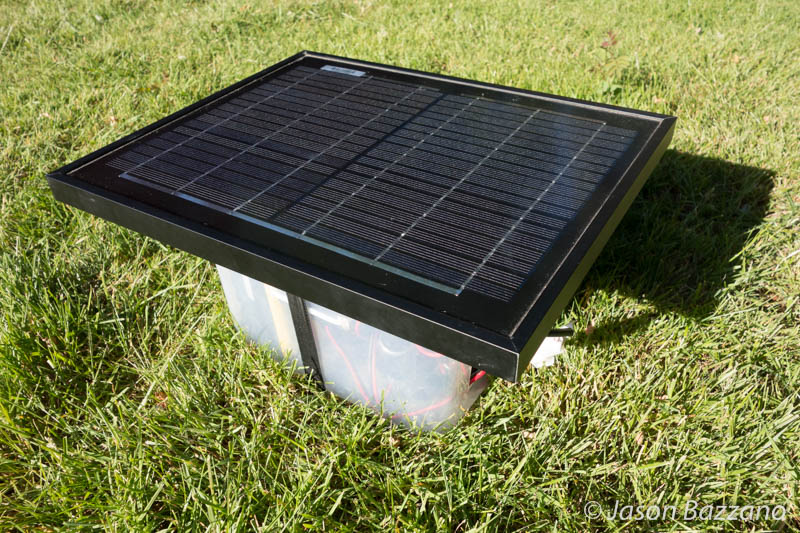
And now for the power source. The first time I went black lighting (back in the early 90s) we used a noisy, smelly, gas-powered generator. However, internal combustion is so 20th-century – there are much better solutions now. I’ve developed a completely silent, battery-powered, solar-charging setup. This can run a 20 watt fluorescent UV lamp for 5+ hours a night, every night, as long as you leave it charging during the day (and provided it’s reasonably sunny out).
For the battery, you’ll need a “deep cycle” lead-acid type, designed to fully discharge (normal lead-acid batteries don’t cope well with fully discharging – it tends to reduce the lifespan of the battery). No need to get a full-sized car battery; 15-20 amp hours ought to be plenty.
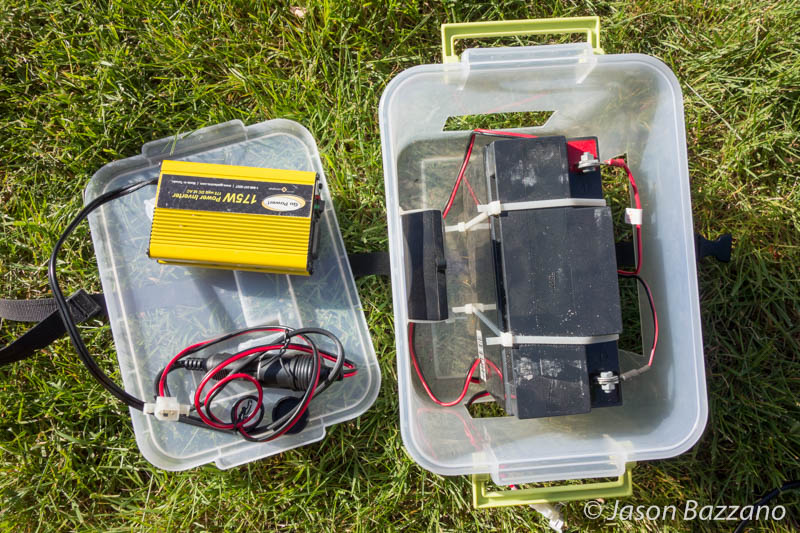
To plug the lamp into the battery, you’ll need an inverter. The inverter converts the DC power that the battery puts out into AC power, which is what the lamp needs. I highly recommend getting a small, fan-less unit. While the larger units are good for higher-draw appliances, you really don’t need much to run a fluorescent light bulb, and the lack of a fan keeps the unit compact, completely silent, and reduces the amount of electricity the inverter itself needs to operate. Typical smaller inverters are designed to plug into car outlets, so you’ll need a 12 volt socket adapter to wire the unit directly to the battery.
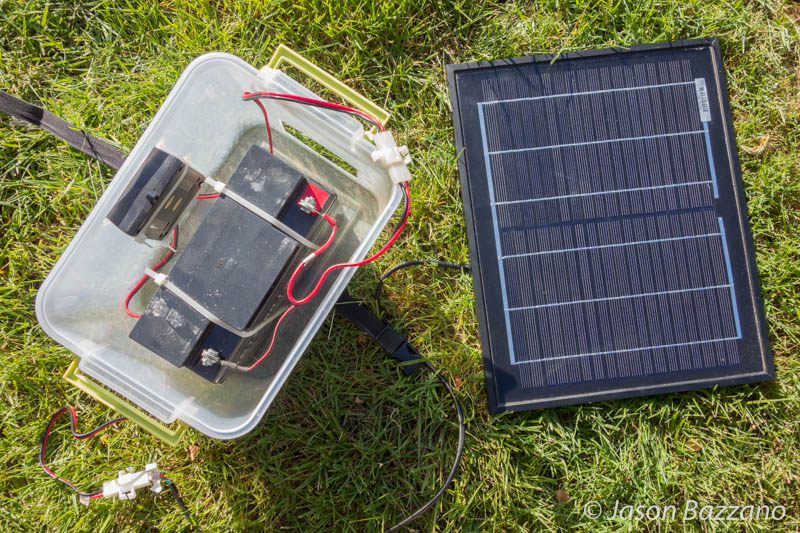
And to charge the battery, you’ll need a 10 watt solar panel and a charge controller. The charge controller is wired in series between the solar panel and the battery; it prevents the solar panel from over-charging the battery (as well as the battery discharging into the solar panel at night). It also tells you when the battery is fully charged.
Other odds and ends you’ll need:
- Zip ties
- Molex connectors (x2 pairs)
- Clear plastic bin: ~7” tall, ~7” wide, and ~9” long. (You may want to just pick this up at a local office supply store to ensure that the dimensions are exactly what you need).
And finally, the tools for the job:
- Wire cutters/strippers
- Box cutter
- Soldering iron (optional)
I put on Molex connectors on all the contacts. This allows me to easily disassemble the contraption for transport, as well as swap out the solar panel for the inverter. (Just make sure the polarity is lined up! Red touches red, black touches black.) You can solder these on for more secure connections, or just crimp them.
With the 12 volt socket adapter, cut off the clips and replace it with a Molex connector. This leaves you with an adapter that allows you plug the inverter into the battery.
Zip tie the battery to the floor of the plastic bin. I also used a box-cutter to cut some holes in the sides of the bin to encourage convective cooling of the battery while charging, though to be honest, I really don’t know how effective that is since I haven’t measured the temperature of the unit. So far no issues, though.
Then zip tie the charge controller to the inside of the bin with its front facing outwards, so you can see the charging status of the battery through the transparent side.
If all goes well, you should have enough space in the bin to store the inverter and socket adapter when not in use.
Here’s what your finished product should look like:
- When the battery is charging it will be: battery, Molex, charge controller, Molex, solar panel.
- When in operation it will be: battery, Molex, socket adapter, inverter, lamp.

And to summarize, here’s the full parts list:
- Bed sheet
- Velcro straps
- 20 watt fluorescent UV lamp
- Spill-proof deep cycle 12 volt battery (18 amp hours)
- 175 watt fan-less inverter
- 12 volt socket adapter
- Solar panel (10 watt)
- Solar charge controller (7 amp)
- Zip ties
- Molex connectors (x2 pairs)
- Plastic bin
Honestly, I don’t know why black lighting for insects isn’t more popular: hanging out at camp on a balmy summer evening with a beer in hand, watching the insects come in is the perfect way to wind down after a long day of entomologizing.
Do you have any suggestions for improvements or streamlining this design? I’d love to hear about them in the comments below!